💡 Tip: Use a supported browser for the best dashboard
experience.
⚠️ Warning: Ensure your login credentials remain
confidential.
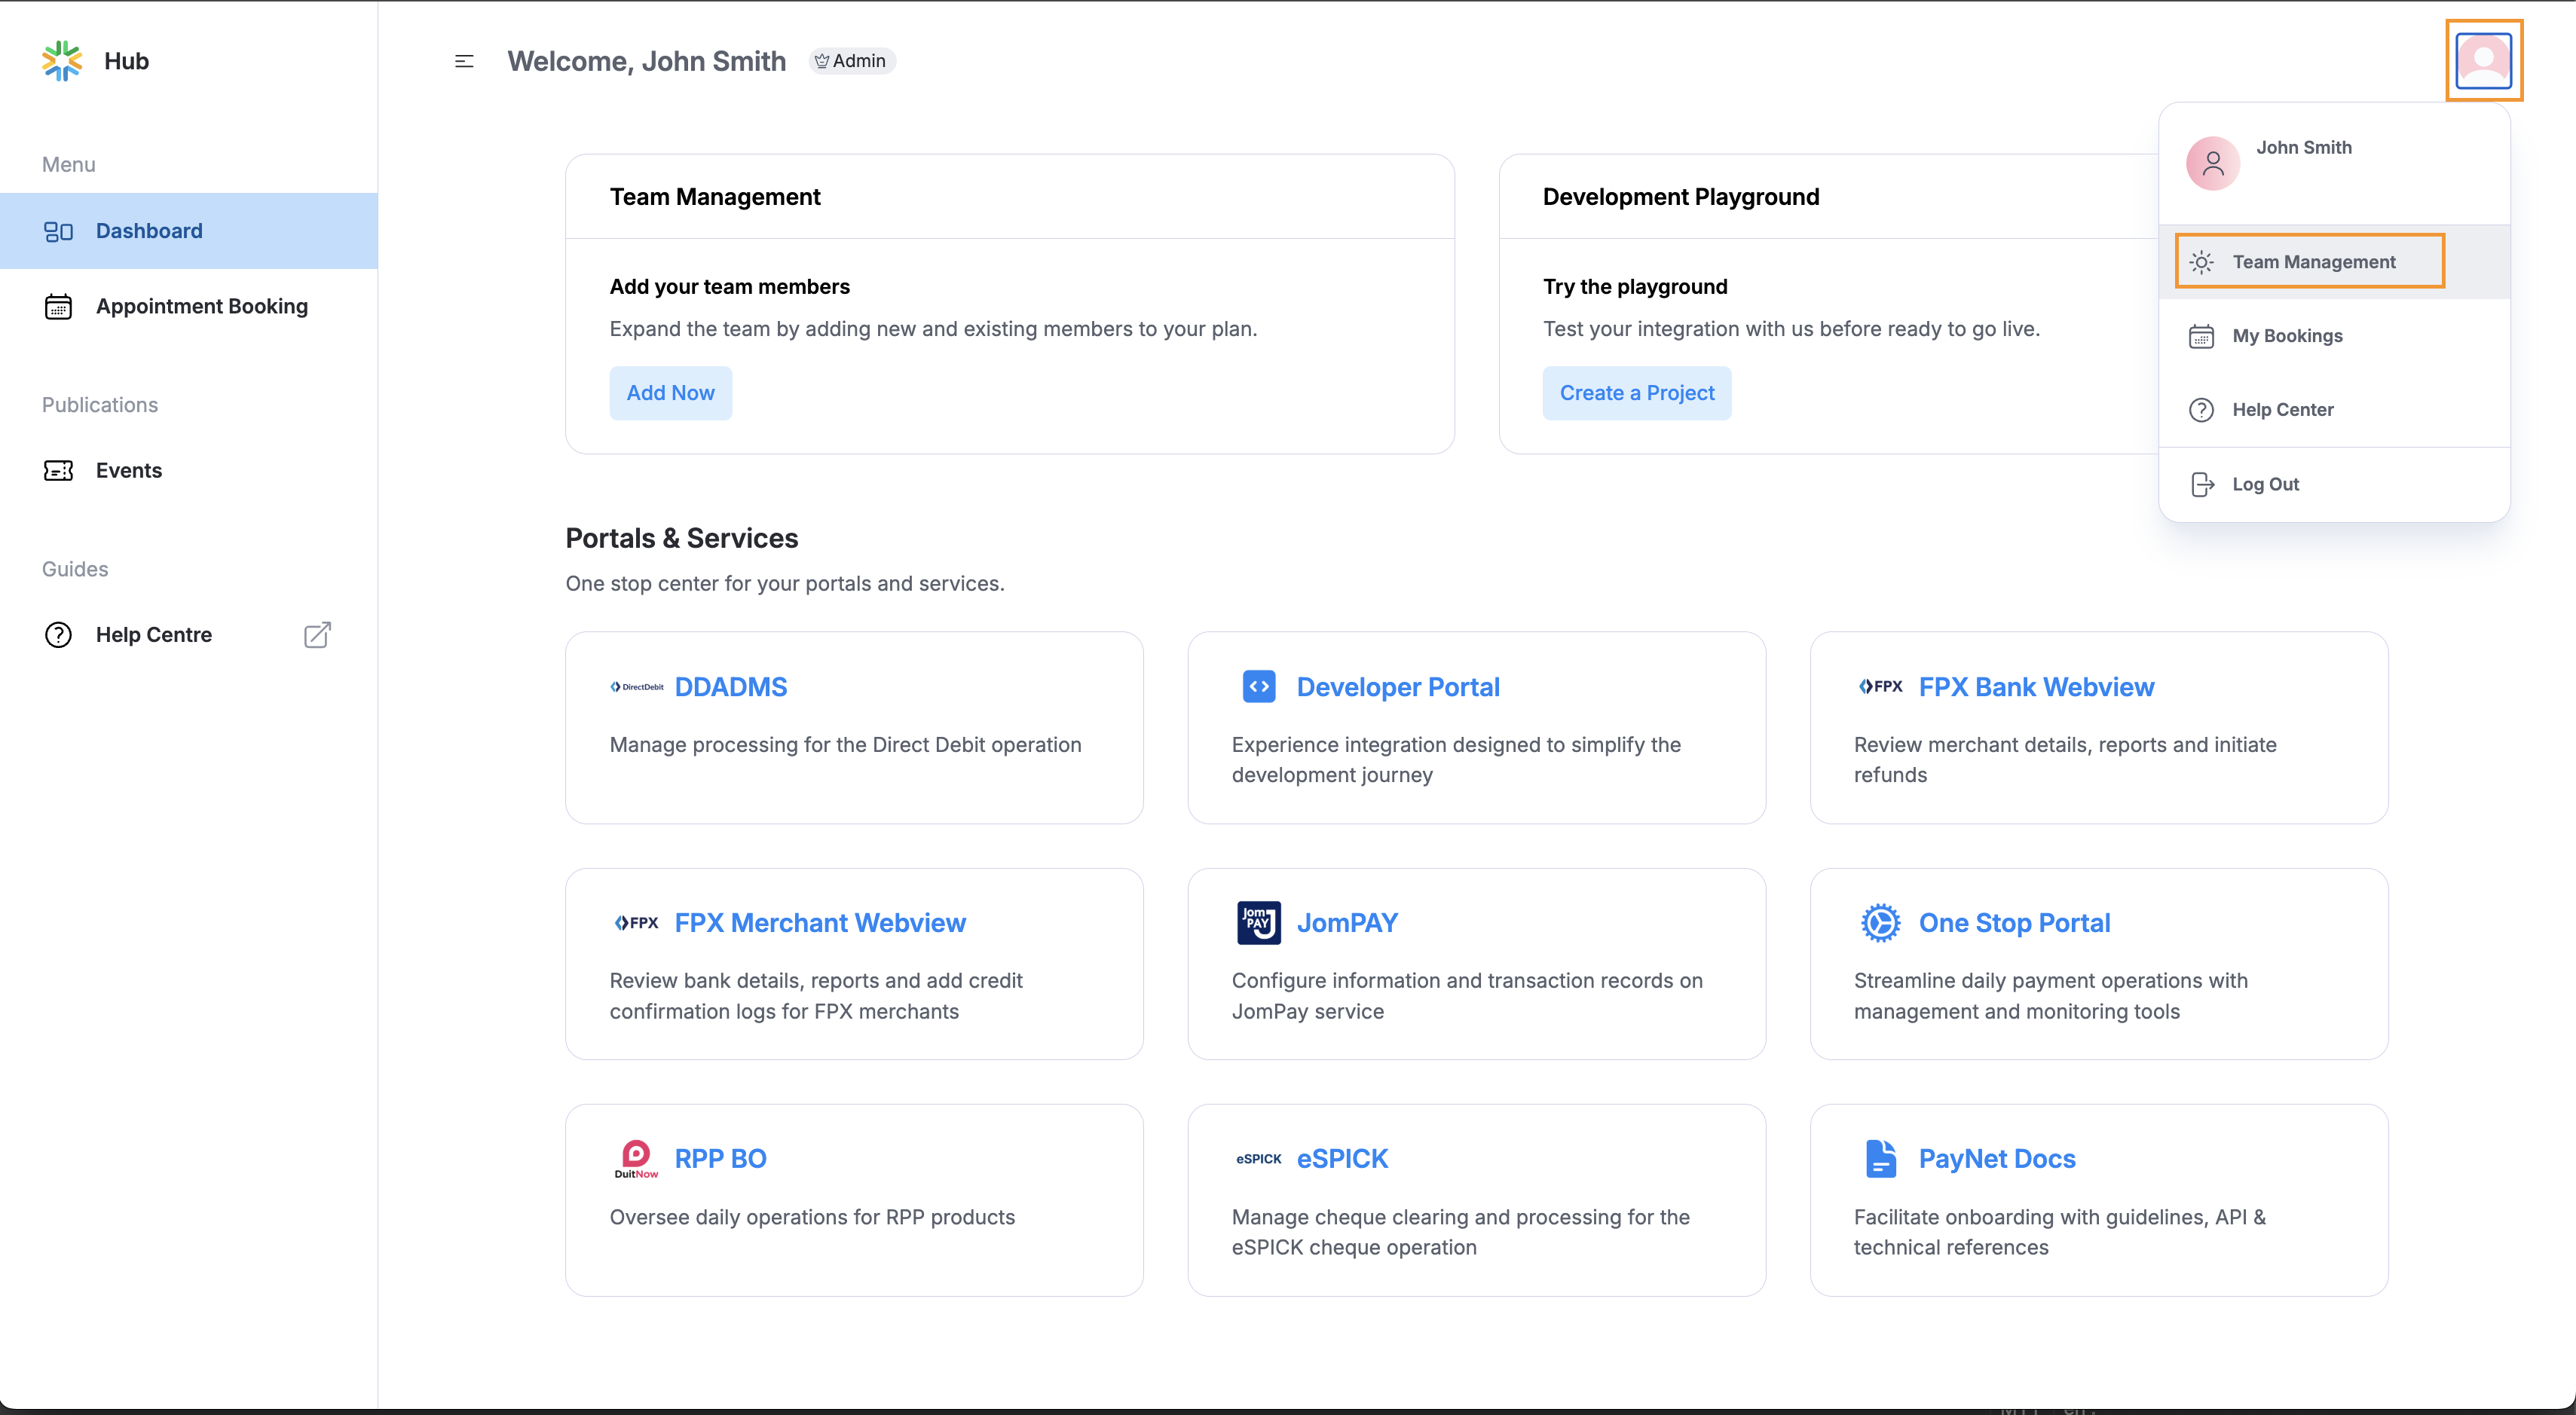
2. Navigate to Team Management:
Click on the user avatar at the top right of the screen
Select “Team Management”
A new tab “User Management” is triggered
✅ Note: The “Team Management” selection
is available to Company Administrators only. Please reach out to
your
company’s admin if you require permissions to the RPP Downtime modules.
Team Management access
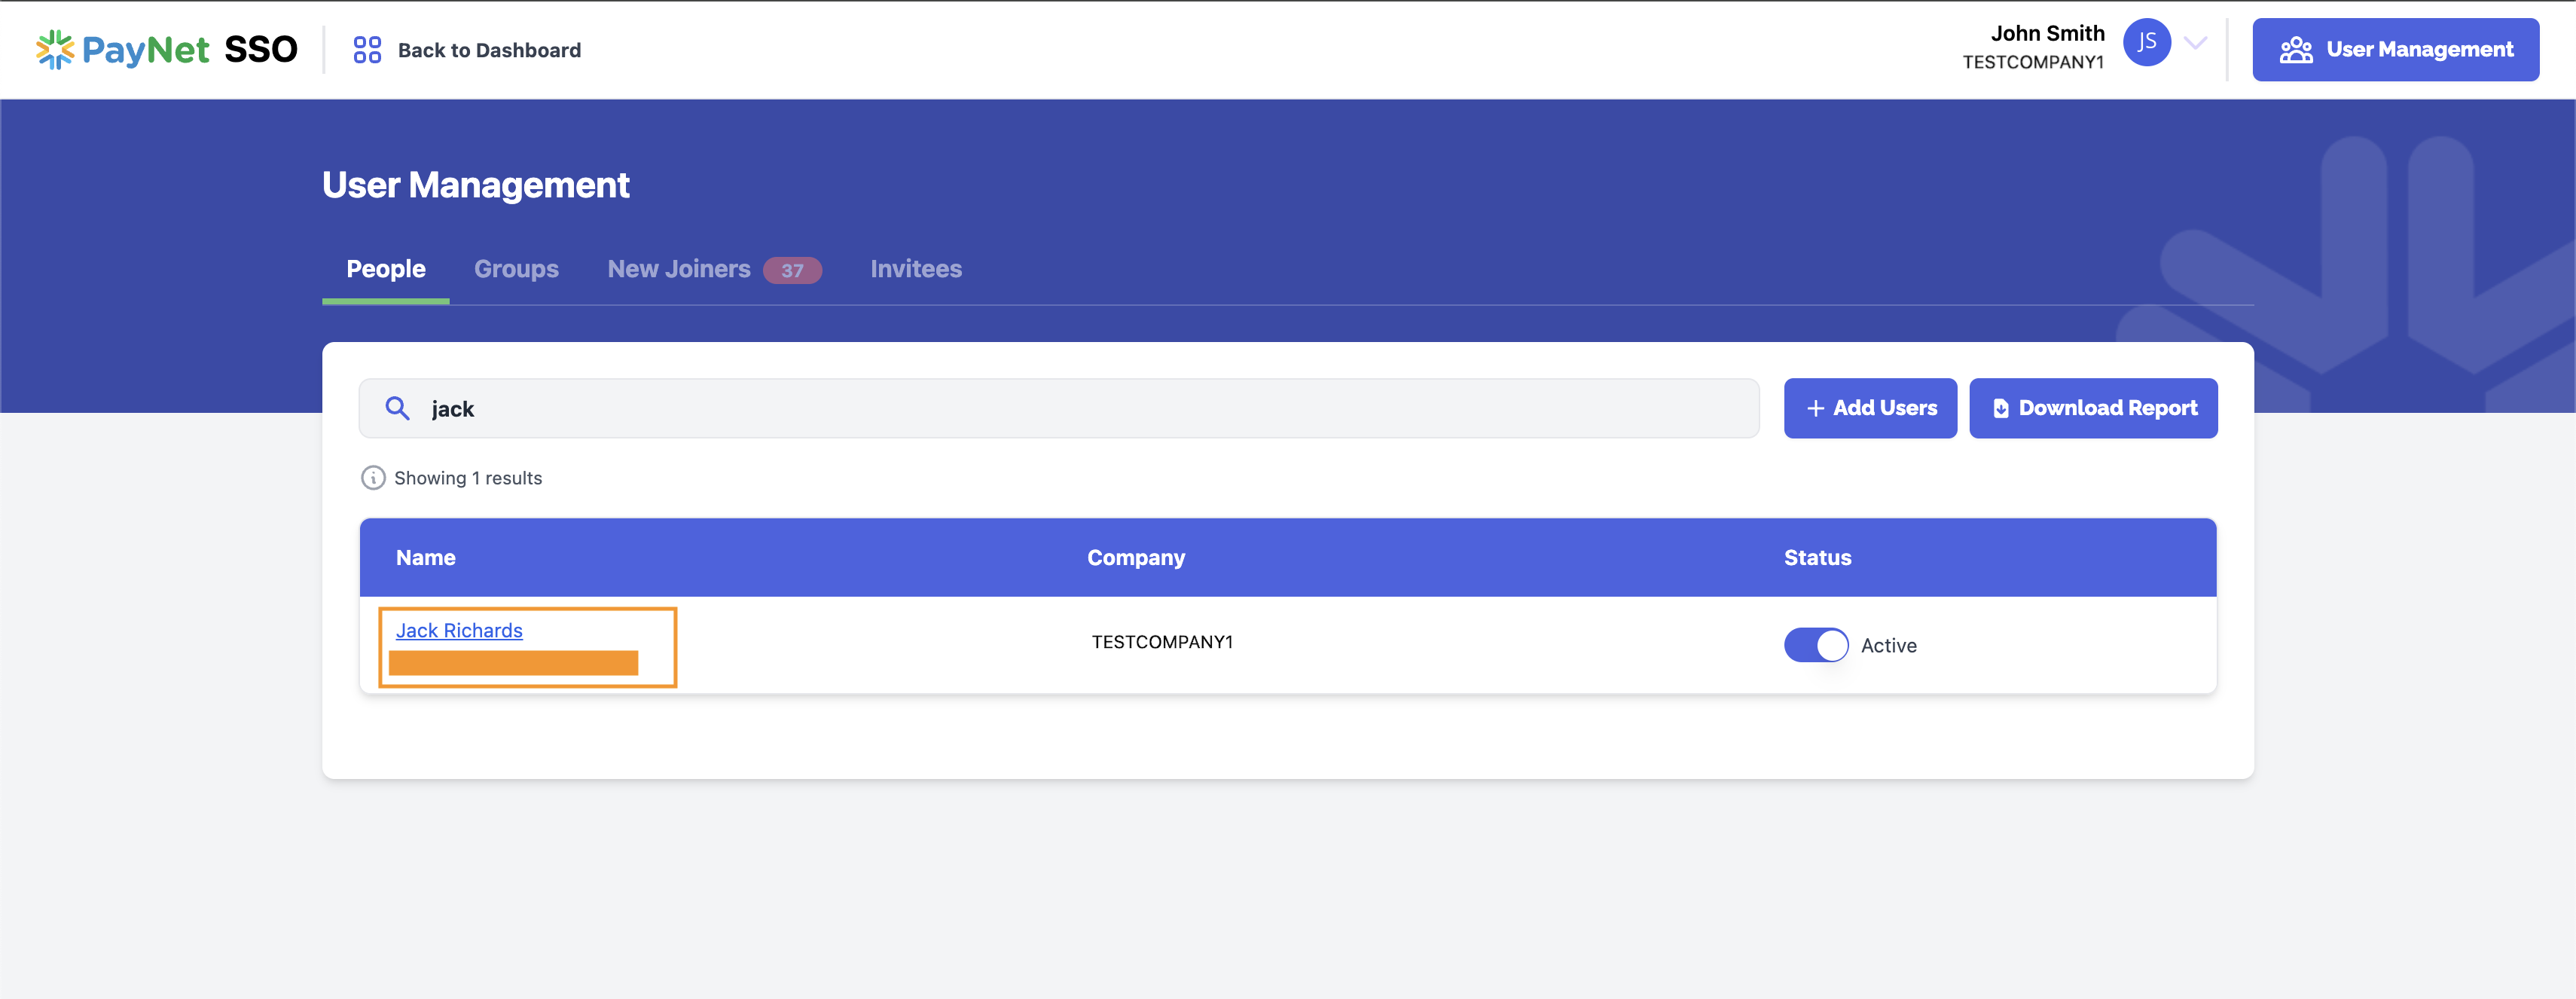
3. Navigate to the team member in question:
In the new “User Management”
tab, search for the team member who will be interacting with
the Downtime
Maintenance - RPP module.
Click on the team member’s name
💡 Tip: Use the search bar for quicker access to
the team member.
Search and select the team member
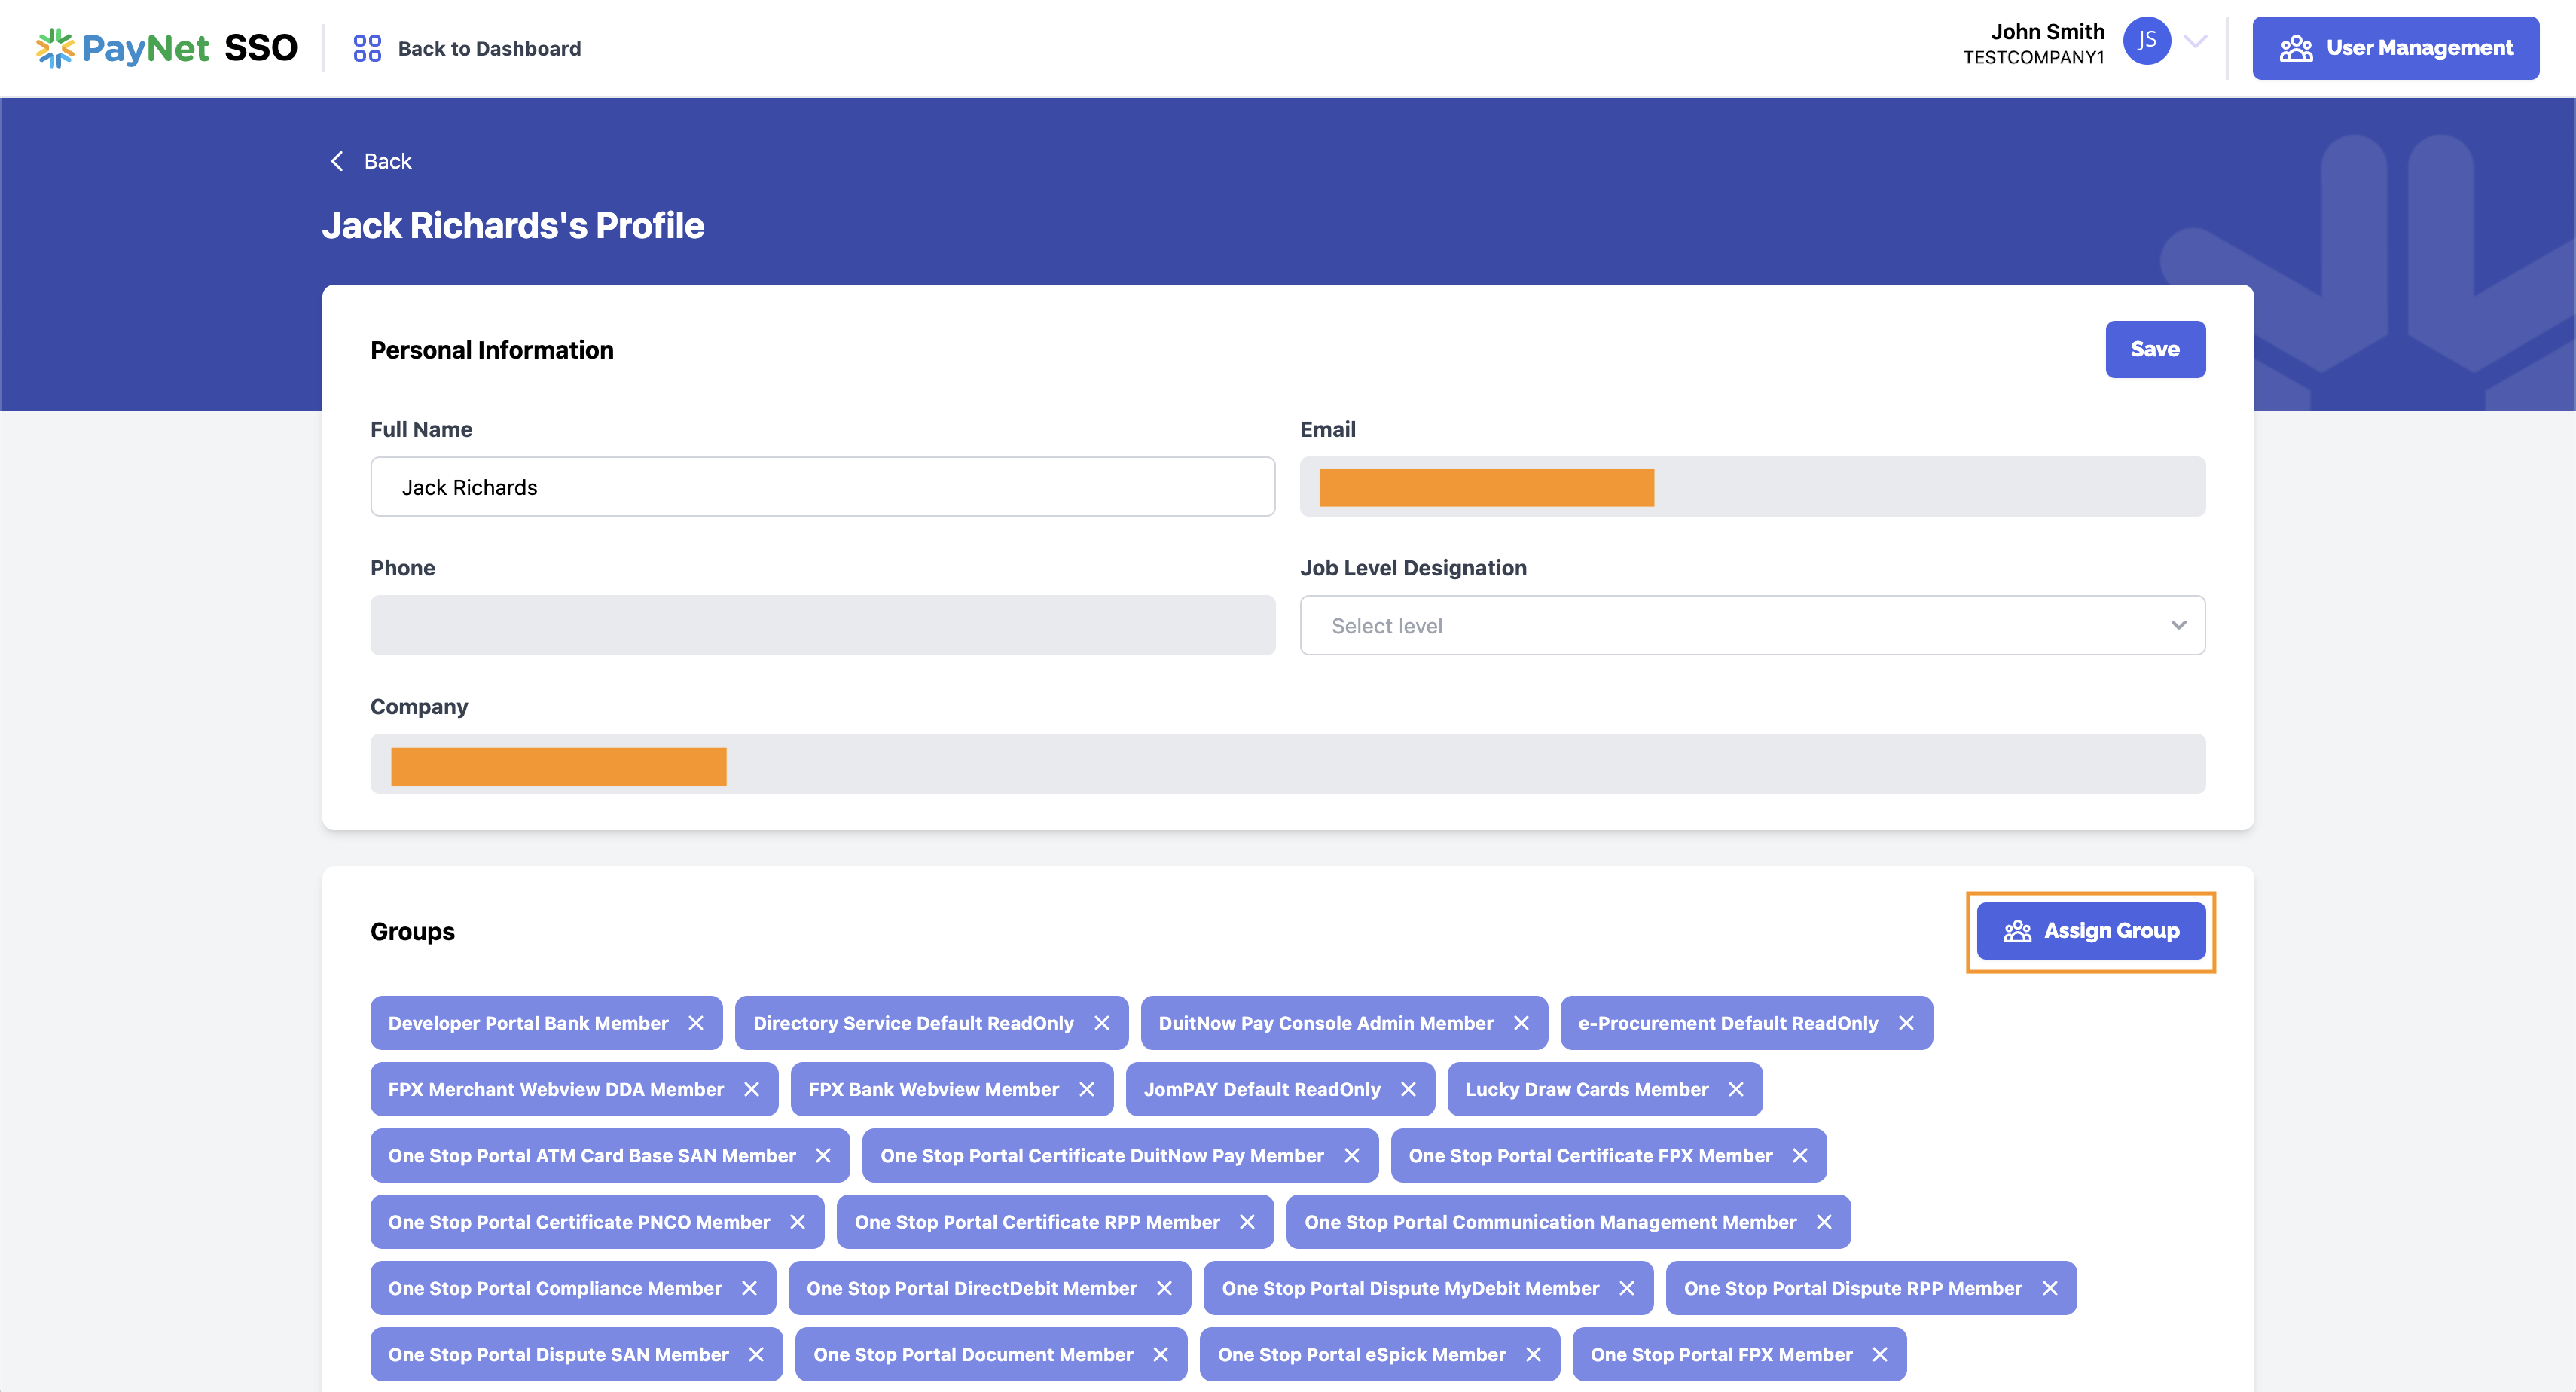
4. Assign them an RPP role:
Click on the “Assign Group” button
to assign the required roles to them
Click “Assign Group”
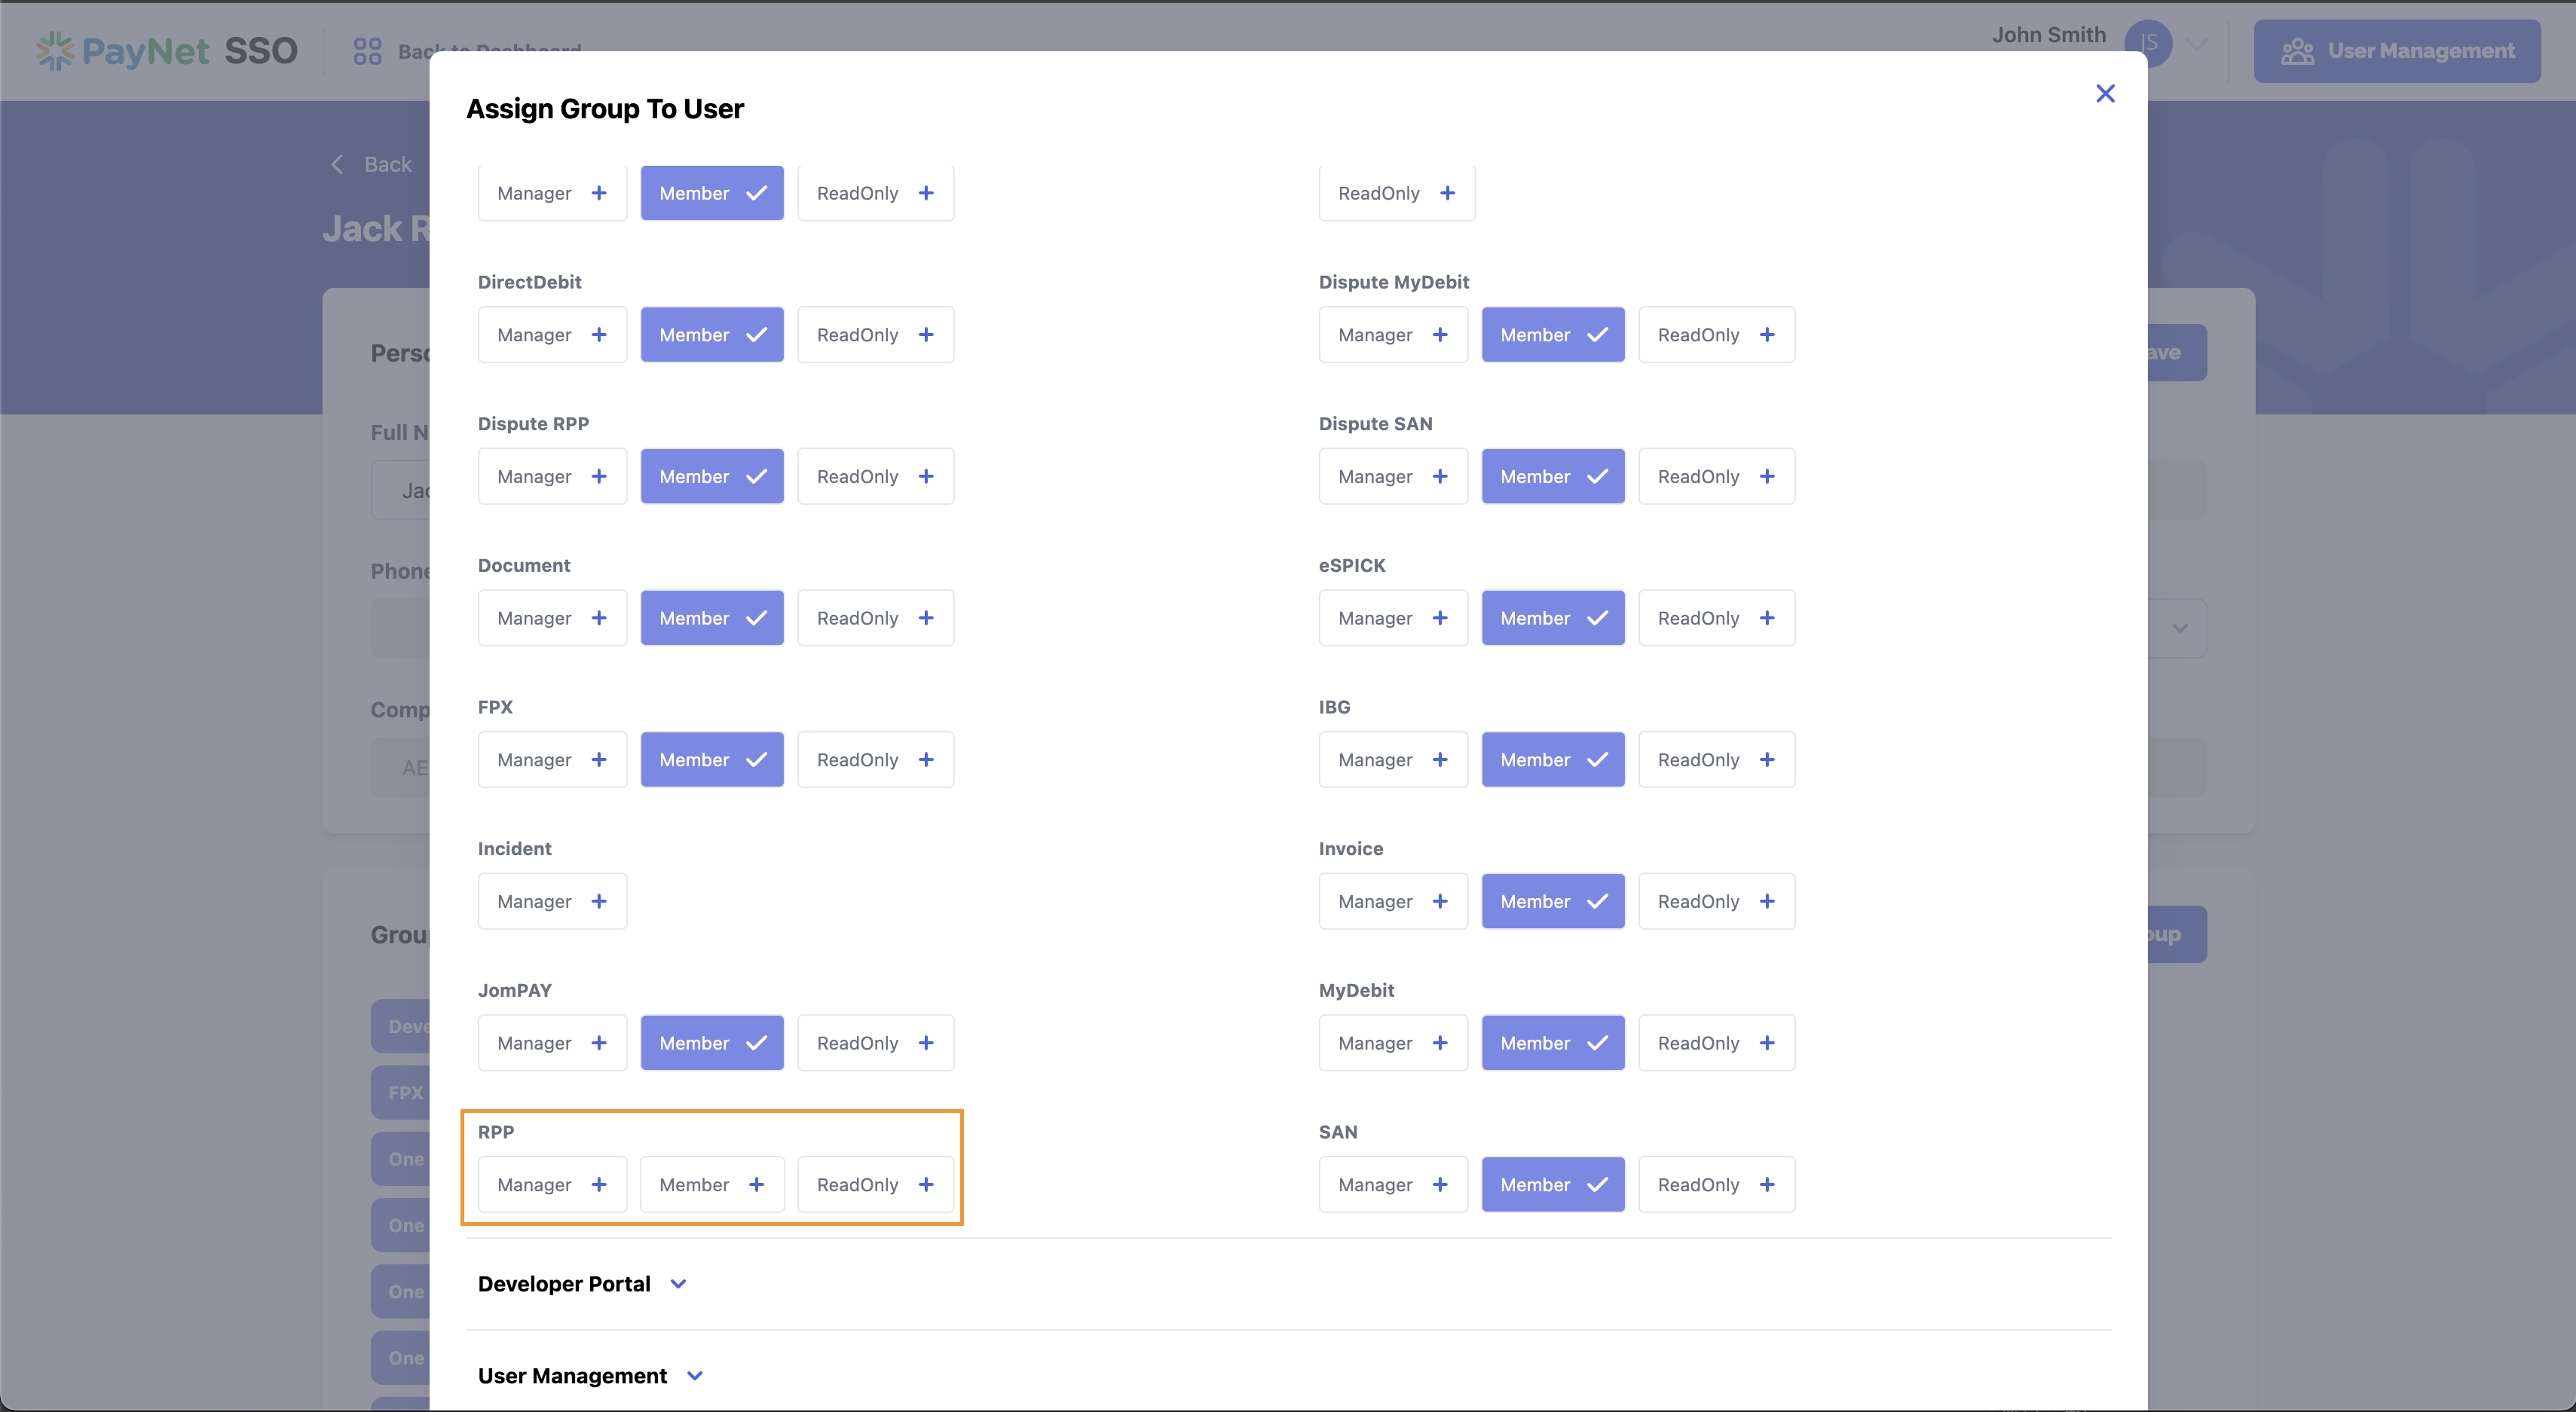
A pop up “Assign Group To User”
appears
In the One Stop Portal Group,
scroll down to the RPP module
Select the “Member” role
if the team member needs maker permissions (initate RPP Downtimes)
Select the “Manager” role
if the team member needs checker permissions (approve/reject
initiated
RPP Downtimes by the RPP Member)
Select the “ReadOnly”
role if the team member should not have any initiation or reviewing
rights,
but is able to see the RPP tab in the Downtime Maintenance module.
When done, click the “X” at
the top right of the pop up
⚠️ Warning: More than one role can be assigned per
user. Please ensure compliance
to internal role - permission metric when performing role assignment.
Assign Group To User (role options)
Role selection confirmation
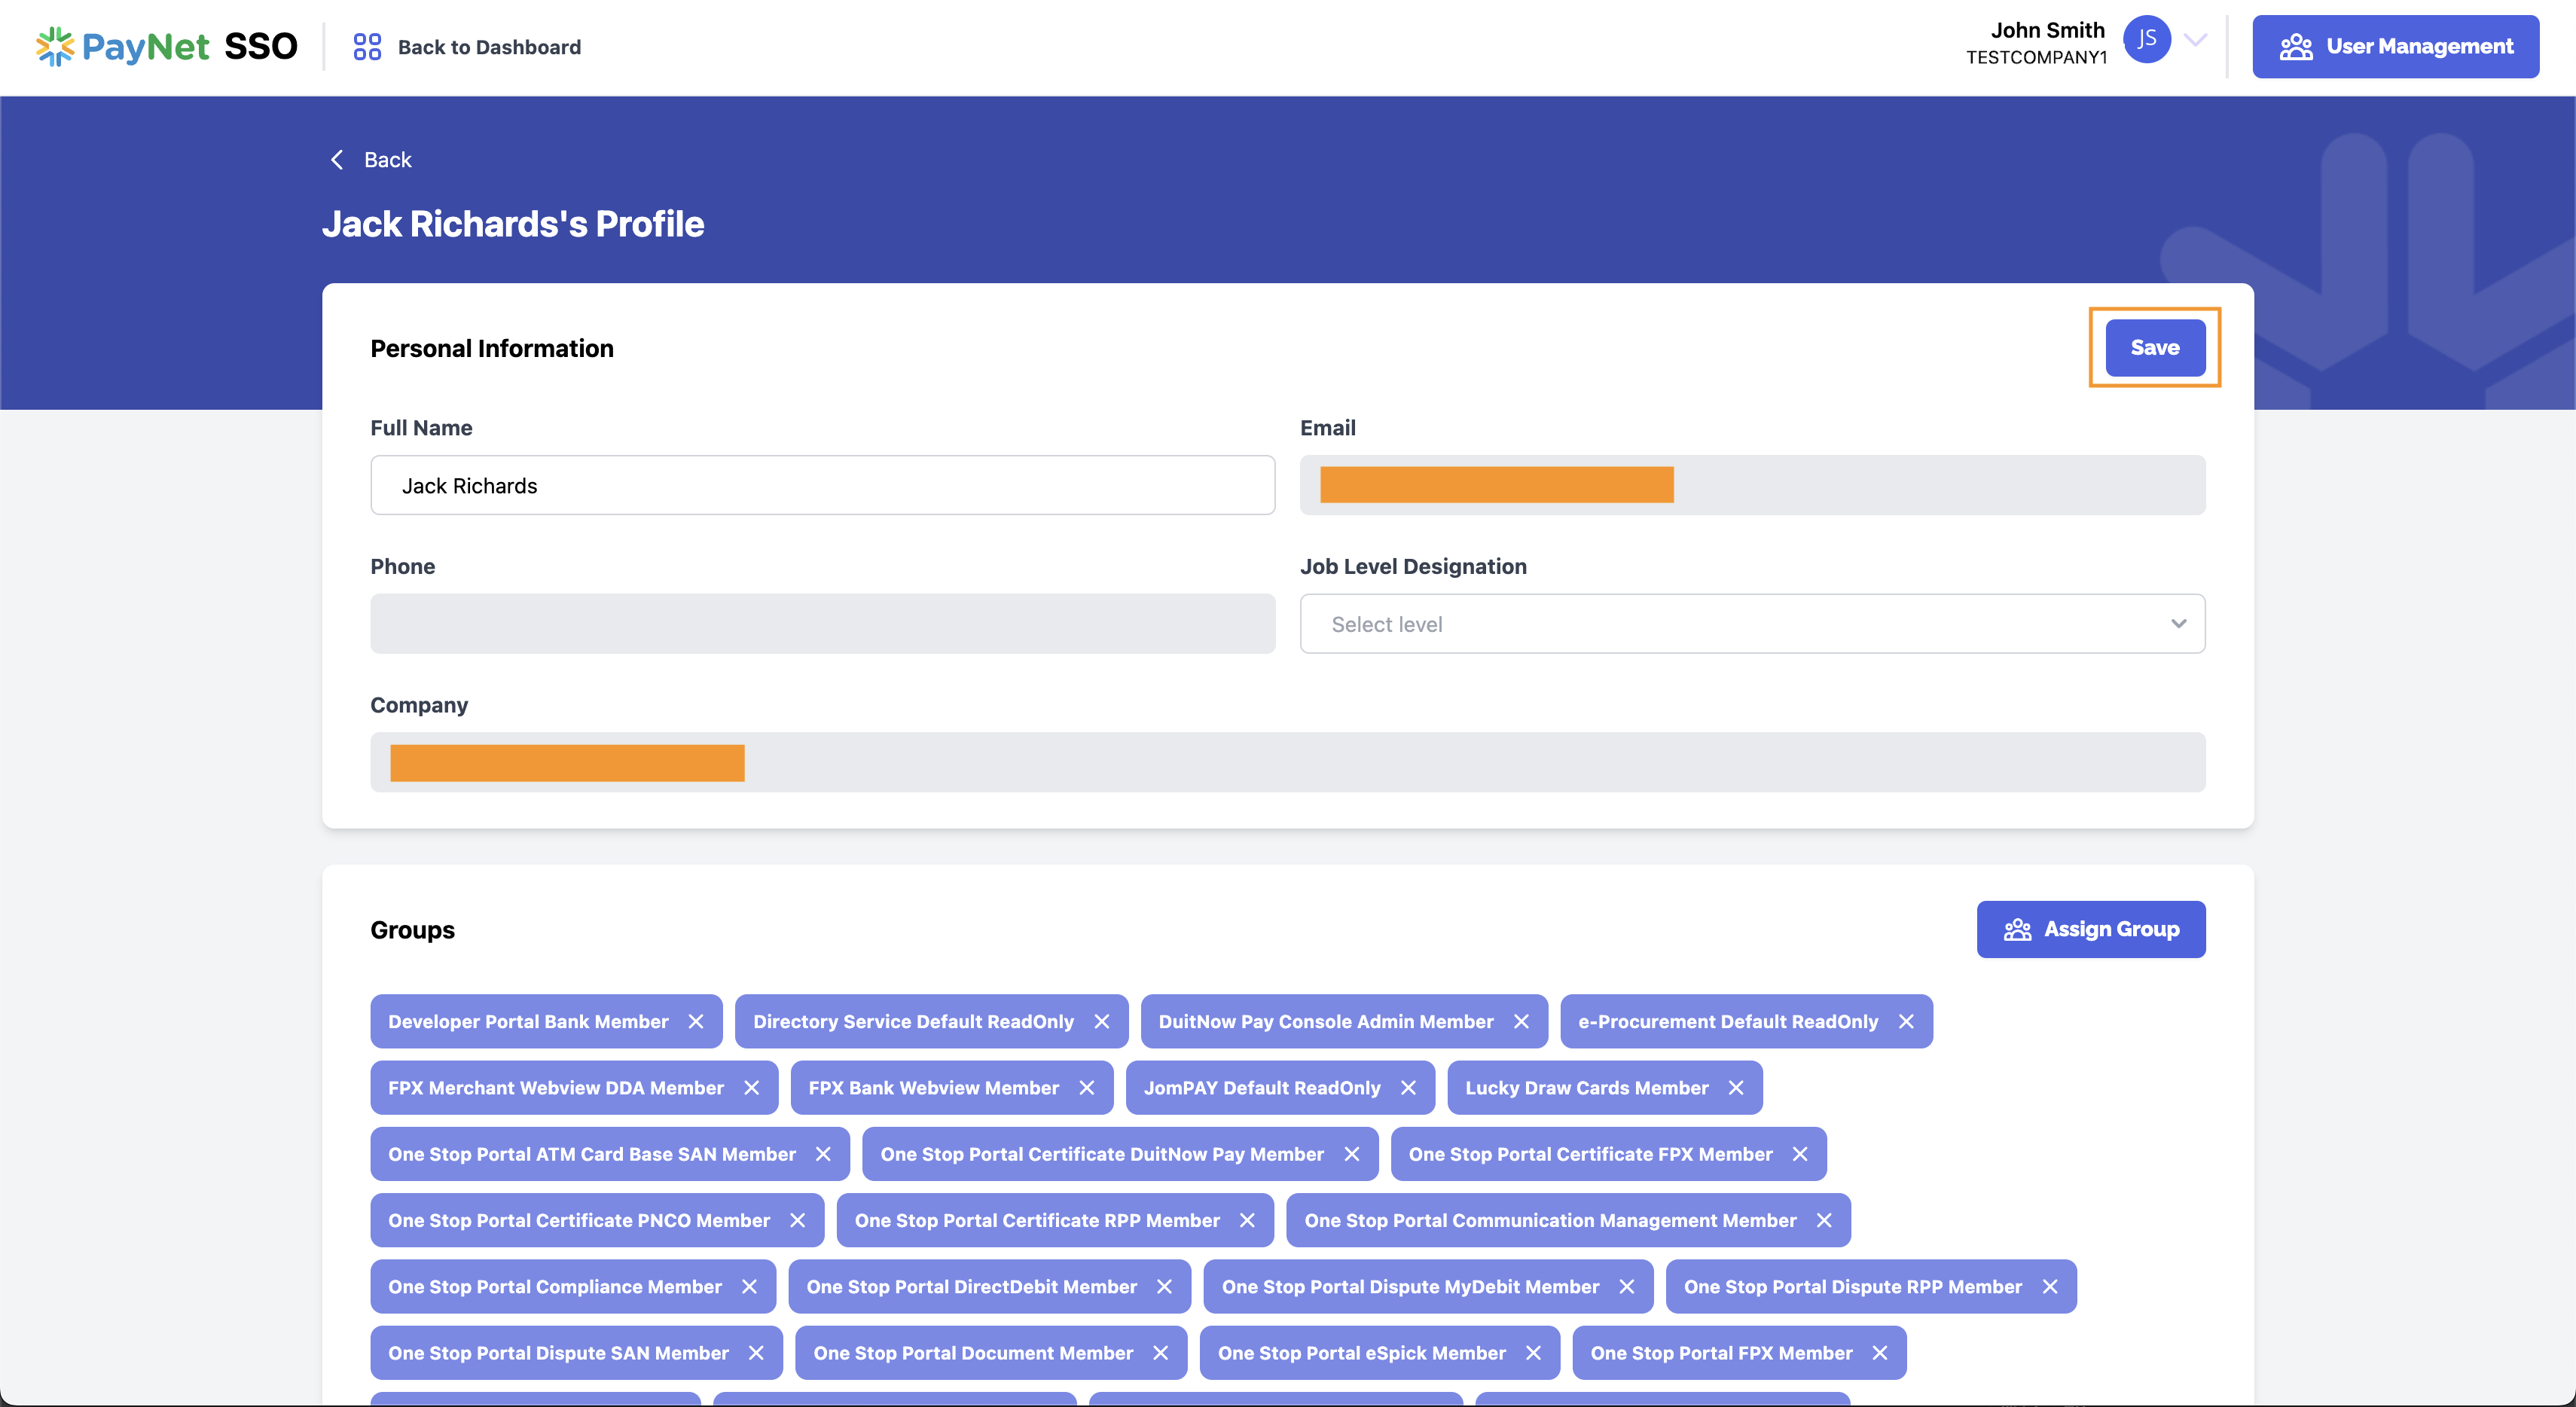
4. Save changes:
Click “Save” on
the top right of the screen
The team member’s new permissions are now in effect. They are
required
to logout and login to experience the new permissions applied.
💡 Tip: Remind team members to log out and back
in after role changes so the new permissions take effect.